Admin guide
Everything about the admin console “WePrintEasy Printer Management”: assigning printers, the printer list, diagnostics and settings.
On this page
Starting the admin console
Start it via Windows Tools → WePrintEasy Printer Management (German interface: WePrintEasy Druckerverwaltung) or C:\Program Files\WePrintEasy\WePrintEasy-Admin.cmd. If you lack write permissions for the configuration, the program offers to restart itself as administrator.
The console has six tabs: Assignments, Printer list, Check user, Setup check, Settings and Guide. It is available in English and German – see Settings.
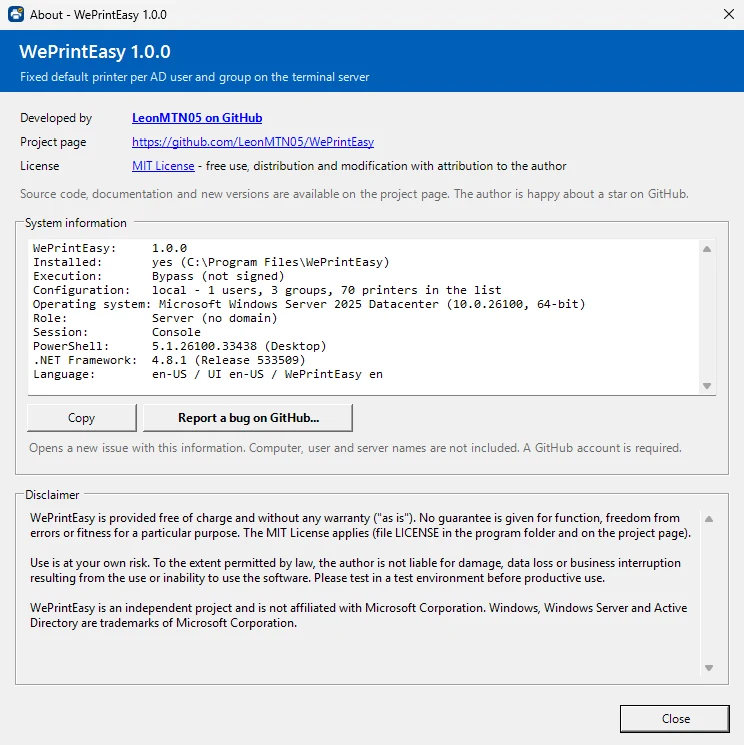
About (button at the top right or F1) shows the version, project page, licence, system information and the disclaimer. Report a bug on GitHub… opens a pre-filled issue in your browser – the system information it contains has no computer, user, domain or server names.
Assignments
The Assignments tab lists all assignments with type, name, display name, printer, priority, comment and who changed them when.
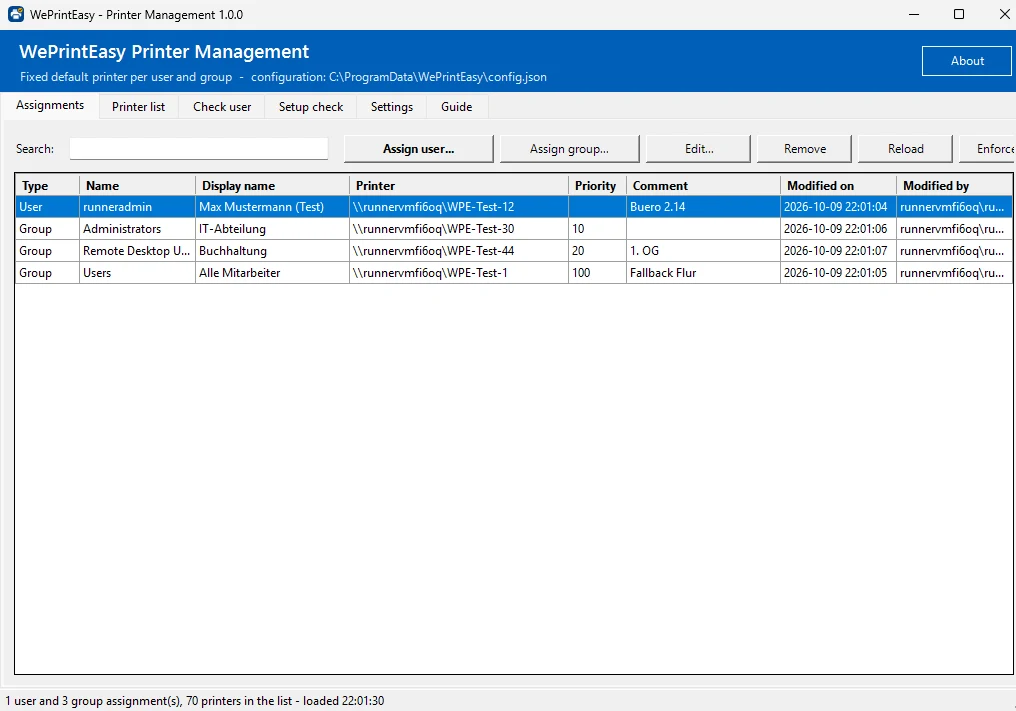
- Assign user… – search for the user in Active Directory (name, logon name or e-mail), select them, choose the printer and save.
- Assign group… – the same for an AD group. The priority decides which group wins if a user is in several groups (the smallest number wins). Nested groups are taken into account.
- Edit… (or double-click), Remove (or the Del key), Reload and the search filter.
- Enforce now… checks and sets the printer for the selected user live on a terminal server – see Troubleshooting.
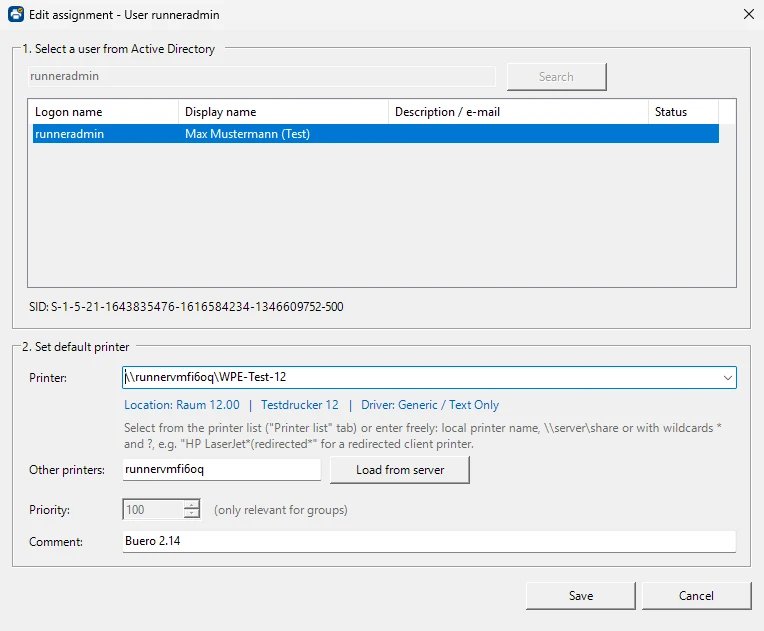
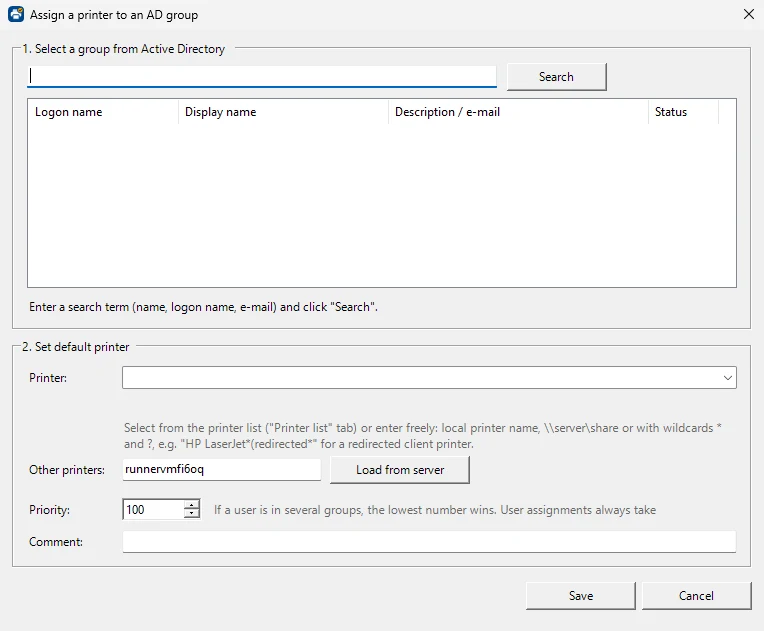
Assignments are stored with the SID of the AD object. Renaming a user or a group in Active Directory therefore does not break the assignment.
Which assignment applies?
The order is fixed:
- Direct user assignment
- Group assignment with the smallest priority number
- No assignment – the default printer is not changed
The Check user tab shows which assignment applies to a user and why.
Specifying the printer
- From the printer list – the printers taken over from the print server during setup; location and comment are shown.
- Network printer as free text, e.g.
\\printsrv01\HP-Office– or enter a server under Other printers and click Load from server. - Local printer installed on the terminal server: simply its name.
- Redirected printer from the client PC – its name contains the session number, so use a wildcard:
Brother HL-L2350DW*(redirected*on English Windows,Brother HL-L2350DW*(umgeleitet*on German Windows. Check the exact name withGet-Printerin the user’s session.
Wildcards * and ? are allowed. A missing network printer is connected automatically at logon (setting Automatically connect missing network printers).
For redirected printers, users keep “Printers” checked under “Local resources” in their Remote Desktop Connection. The printer is then available in the session as long as the client PC is connected.
Printer list
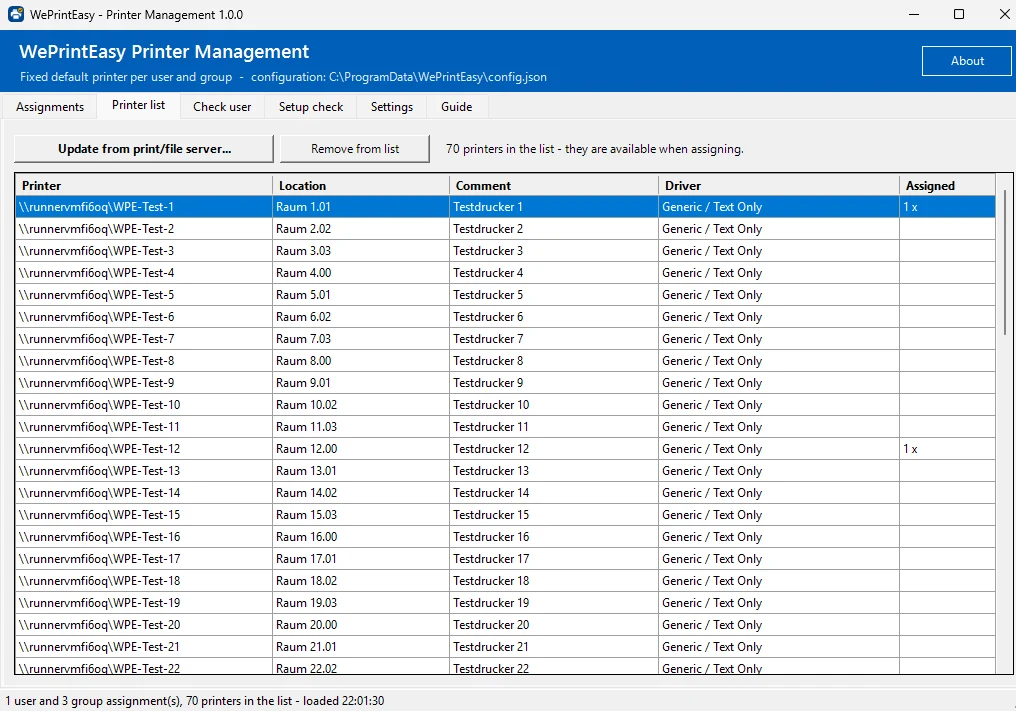
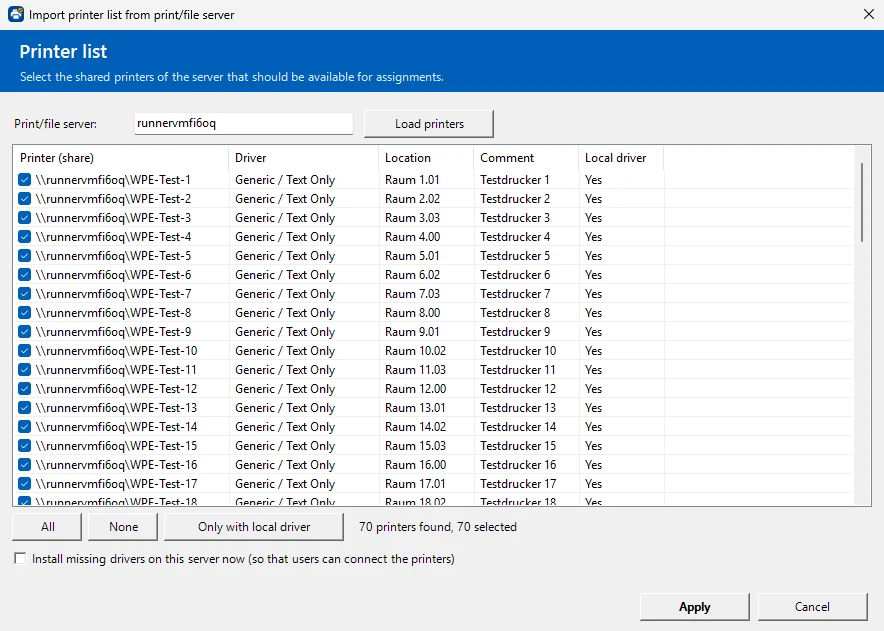
The Printer list tab contains the printers offered when assigning – with location, comment, driver and the number of assignments. Update from print/file server… loads the server’s shares again, for example when new printers have been added, and can install missing drivers. Remove from list removes printers from the list; existing assignments stay unchanged.
Check user
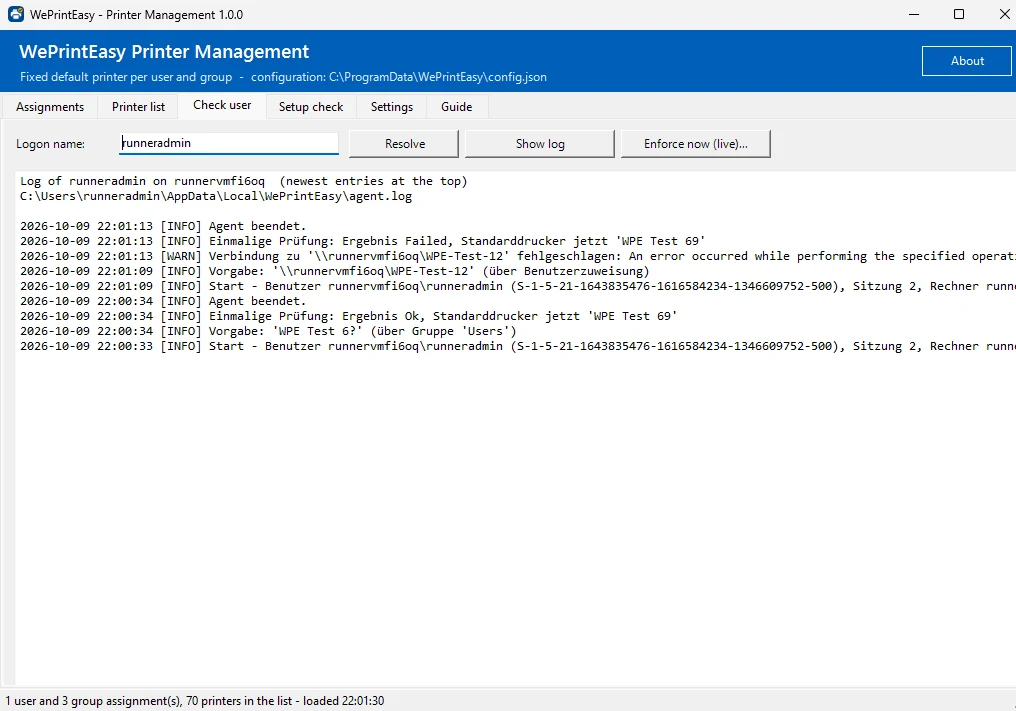
- Resolve shows for a logon name which printer will be set at the next logon and through which assignment – including all matching groups.
- Show log shows what the agent did for this user on this server, for example
Default printer set: … (previously: …). That way you can also see what changed the printer. - Enforce now (live)… starts the live diagnostics for this user, see Troubleshooting.
Setup check
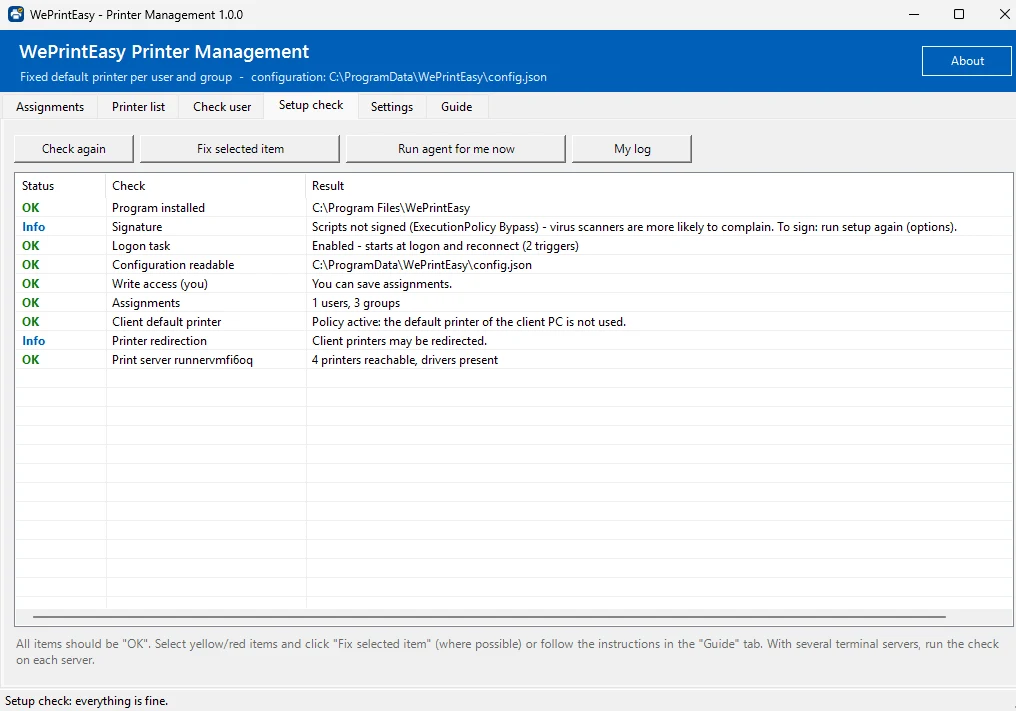
The Setup check tab checks this server and shows a traffic-light status (OK, Warning, Error, Info) for:
- installation and signature,
- the logon task
\WePrintEasy\WePrintEasy Agent, - configuration readable and your write access,
- assignments,
- RDS policies (client default printer, printer redirection),
- every print server in use: reachable, shares present, drivers installed locally.
Fix selected item resolves issues where possible – for example it sets the RDS policy. Run agent for me now tests the agent in your own session; My log shows its log. With several terminal servers, run the check on each server.
Settings
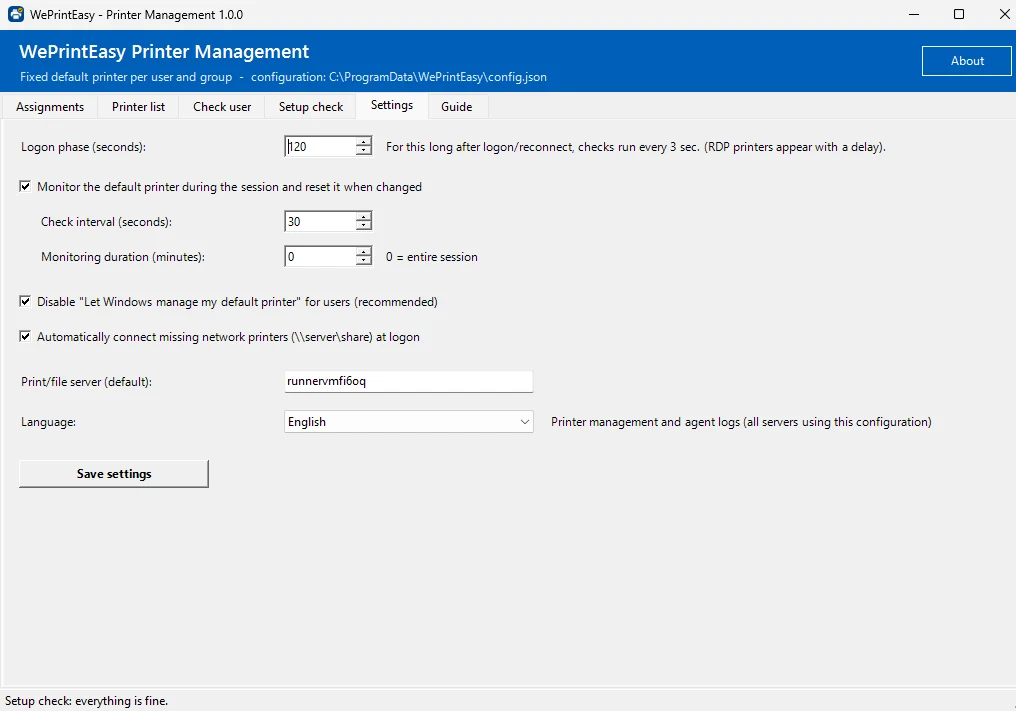
| Setting | Default | Meaning |
|---|---|---|
| Logon phase | 120 s | For this long after logon or reconnect the agent checks every 3 s (redirected printers appear with a delay) |
| Monitor the default printer during the session | on | The default printer is then monitored further and reset when changed |
| Check interval | 30 s | Interval of the monitoring (minimum 5 s) |
| Monitoring duration | 0 | Minutes; 0 = the entire session |
| Disable “Let Windows manage my default printer” | on | Recommended |
| Automatically connect missing network printers | on | Missing \\server\share printers are connected at logon |
| Print/file server (default) | – | Default print server in the assignment dialog |
| Language | from setup | English or German for the admin console and the agent logs – for all servers using this configuration; the admin console offers to restart in the new language |
Changes to assignments and settings are picked up automatically by running sessions (at the latest after one check interval) – users do not have to log on again. Only changed group memberships in AD take effect after the next logon.
Switch off Monitor the default printer during the session. The printer is then only set at logon.
Guide
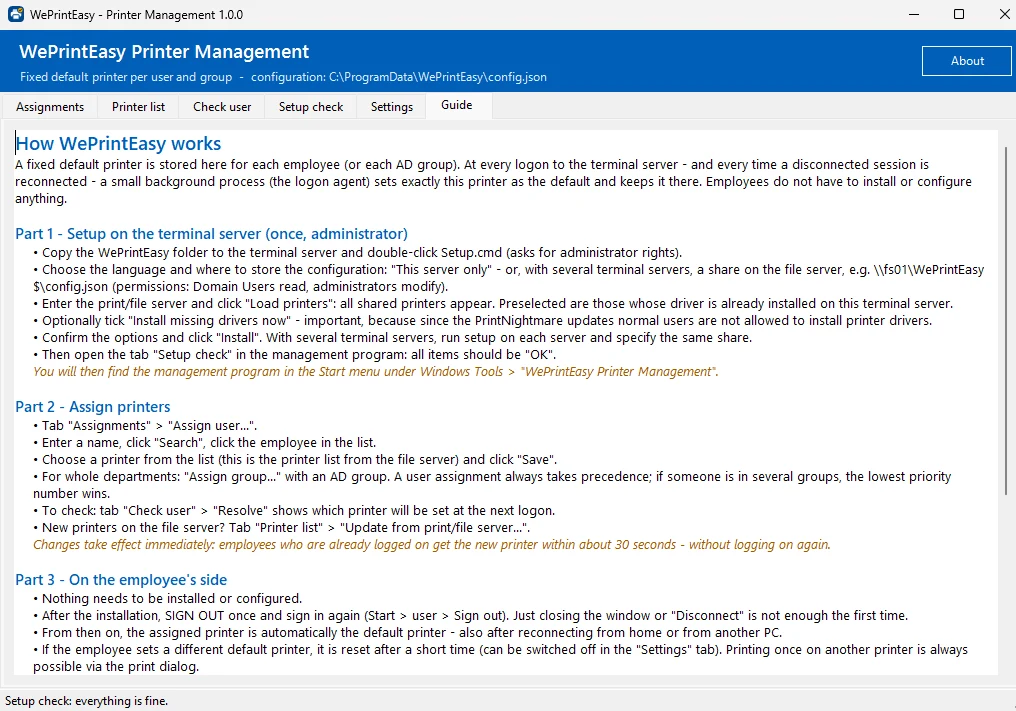
The Guide tab contains step-by-step instructions directly in the program: setup on the server, assigning printers, what happens for users and troubleshooting.
The configuration file
All settings (including the language), assignments and the printer list are stored in config.json (default C:\ProgramData\WePrintEasy\config.json, or the central path on a share). The file is written atomically; the previous version is kept next to it as config.json.bak.
{
  "Version": 1,
  "Settings": {
    "LogonPhaseSeconds": 120,
    "EnforceDuringSession": true,
    "EnforceIntervalSeconds": 30,
    "EnforceDurationMinutes": 0,
    "SetLegacyDefaultPrinterMode": true,
    "ConnectNetworkPrinters": true,
    "DefaultPrintServer": "printsrv01"
  },
  "Assignments": [
    {
      "Type": "Group",
      "Name": "GG_Buchhaltung",
      "Sid": "S-1-5-21-1111111111-2222222222-3333333333-4101",
      "Printer": "\\\\printsrv01\\Kyocera-Buchhaltung",
      "Priority": 10,
      "Comment": "Abteilungsdrucker 1. OG"
    }
  ]
}
The complete example is included in the package as examples\config.example.json – also available here. Use the admin console or the PowerShell module to change it rather than editing it by hand.
Download WePrintEasy ZIP with setup wizard, update and uninstall scripts. Free · MIT licence
Download WePrintEasy 1.0.3