Everything you need to keep default printers where they belong
WePrintEasy is a small, focused tool for Remote Desktop Session Hosts. Here is everything it does – and how it helps you and your users.
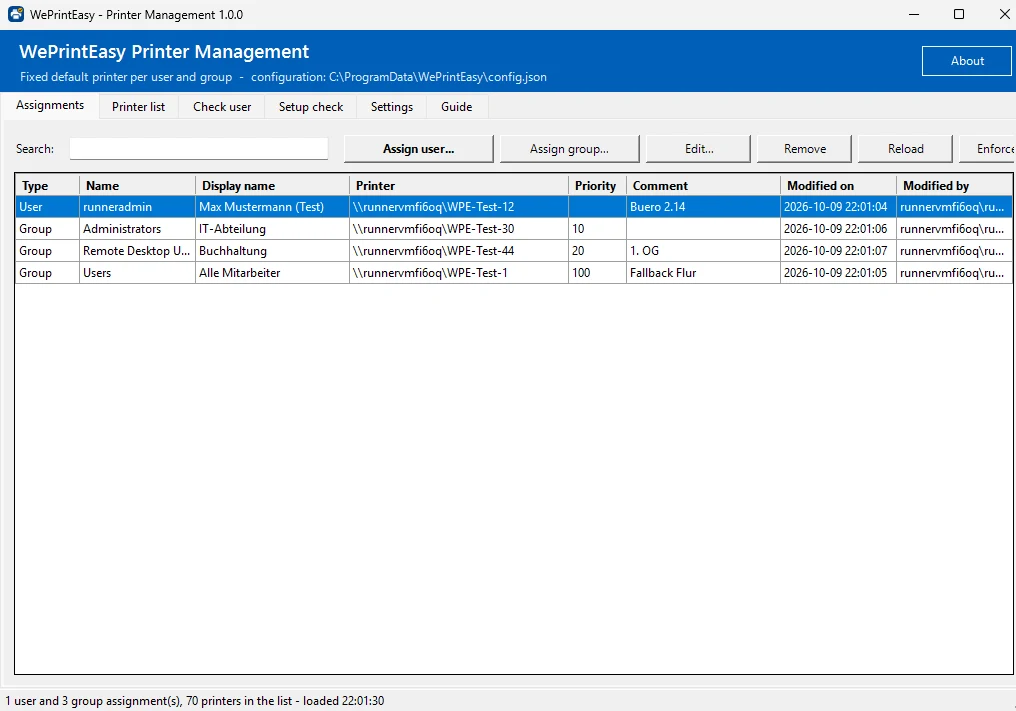
Default printer per AD user or per AD group
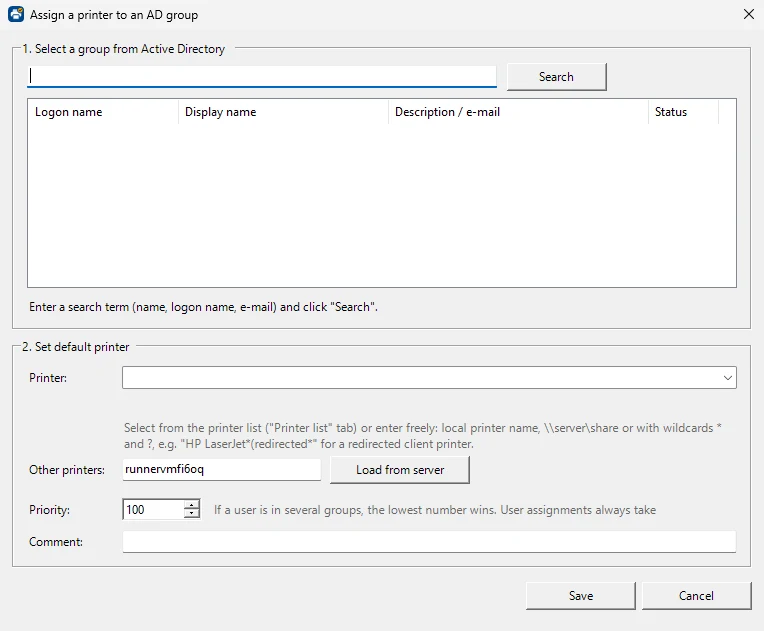
Pick a user or a group directly from Active Directory (search by name, logon name or e-mail) and assign a printer. For groups you set a priority: if a user is in several groups, the smallest number wins. Nested groups are taken into account.
The order is always: direct user assignment → group assignment with the smallest priority → no change. Assignments are stored with the SID, so renaming users or groups in AD does not break anything.
- Search AD users and groups without RSAT
- Priority for groups, nested groups included
- Comment field, e.g. room or department
- Filter, edit by double-click, delete with the Del key
Set at logon, held for the whole session
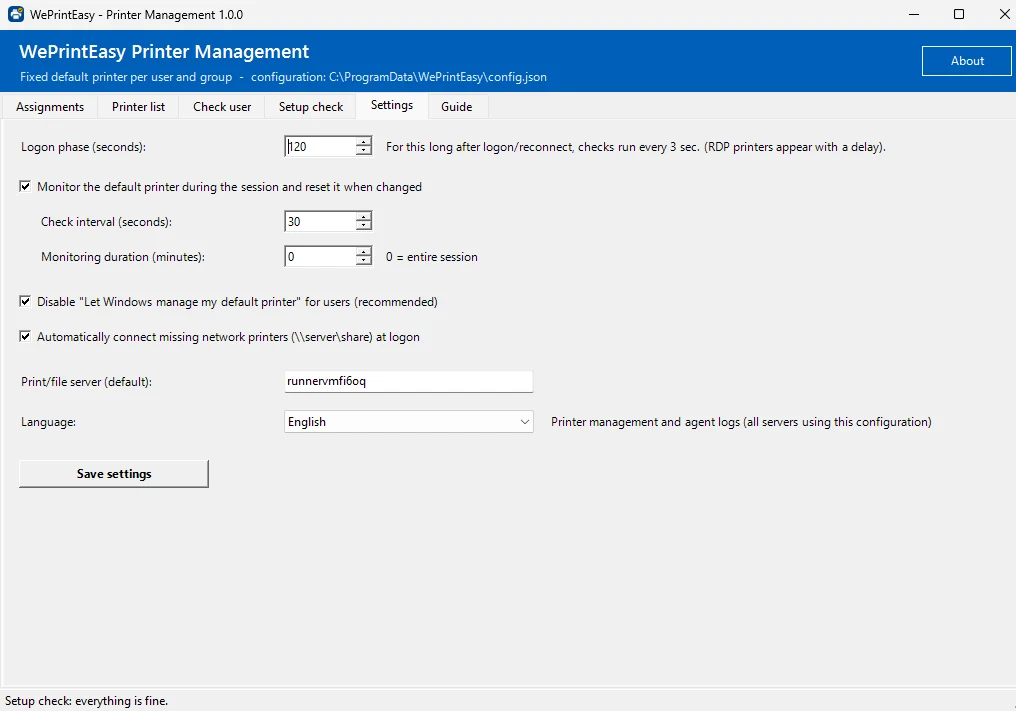
A scheduled task starts the agent at every logon and every reconnect of an RDP session, invisibly in the user’s context. For the first 120 seconds it checks every 3 seconds – this is when redirected printers appear and take over. After that it can keep watching for the whole session (default: every 30 seconds).
Changes to assignments and settings reach running sessions automatically, at the latest after one check interval – users do not have to log off. Only changed AD group memberships need a new logon.
- Triggers: logon and RDP reconnect
- At most one agent per session, practically no load when idle
- Turns off “Let Windows manage my default printer”
- Want users to choose themselves? Turn monitoring off – the printer is then only set at logon
Network, local and redirected printers
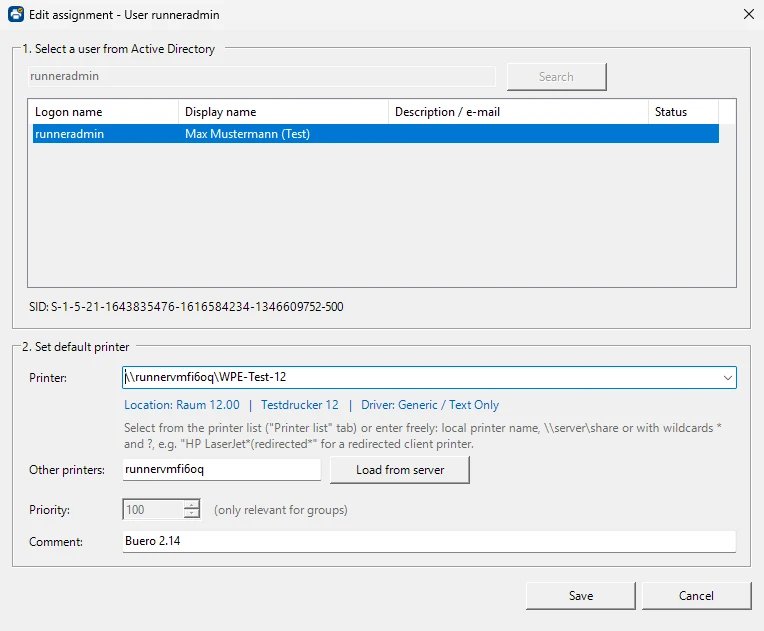
Pick a printer from the printer list, enter a network printer like \\printsrv01\HP-Office, the name of a printer installed locally on the terminal server – or a redirected printer from the client PC with a wildcard, for example Brother HL-L2350DW*(redirected*. The session number in the name does not matter. Ideal for home office users who print on their own printer.
If the assigned network printer is not connected yet, the agent connects it automatically.
- Wildcards
*and? - Network printers are connected automatically
- Location, comment and driver are shown when choosing
Printer list straight from your print server
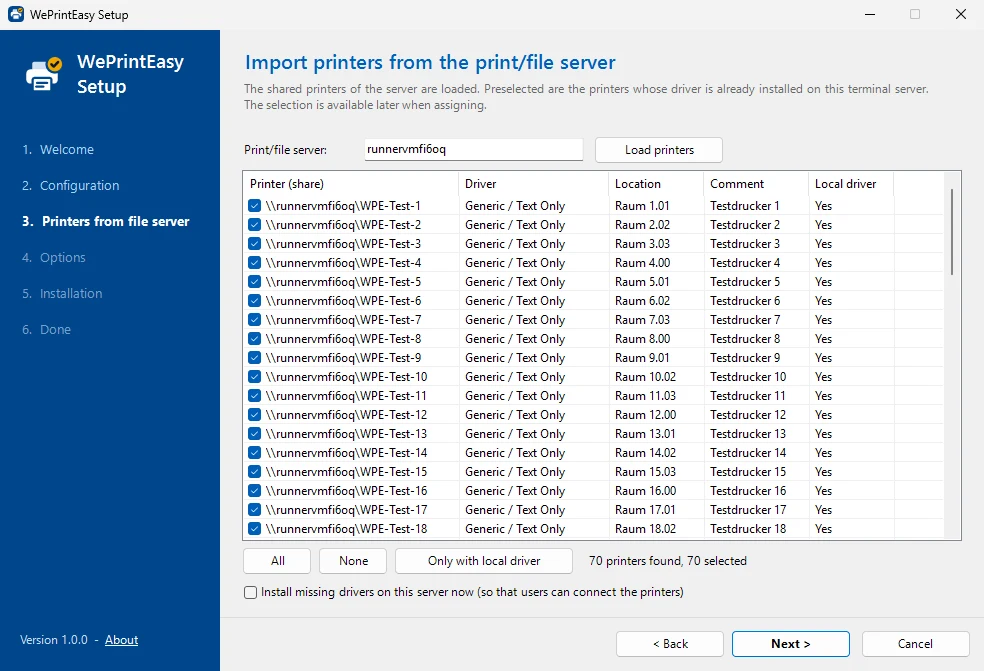
Enter your print or file server and click Load printers: all shared printers appear with driver, location and comment (in the test: 70 printers). Printers whose driver is already installed on the terminal server are preselected. Missing drivers can be installed right away – important, because since the PrintNightmare updates standard users may not install printer drivers.
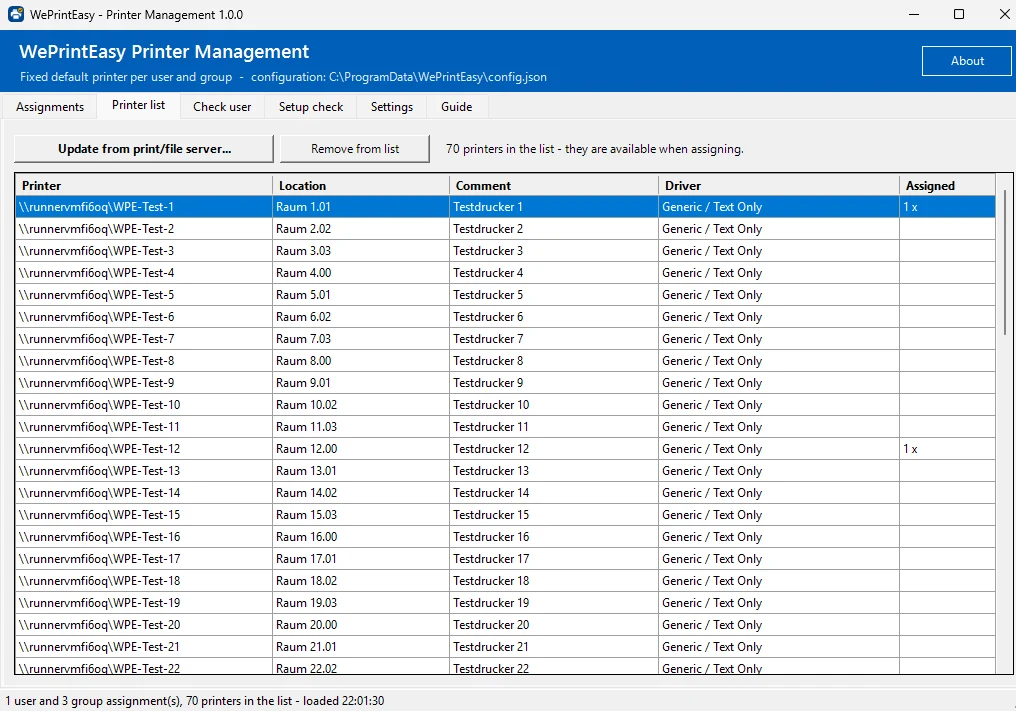
When new printers are added on the print server, the printer list can be refreshed at any time.
- Buttons: All / None / Only with local driver
- Optional: install missing drivers
- Shows how often each printer is assigned
Graphical setup wizard
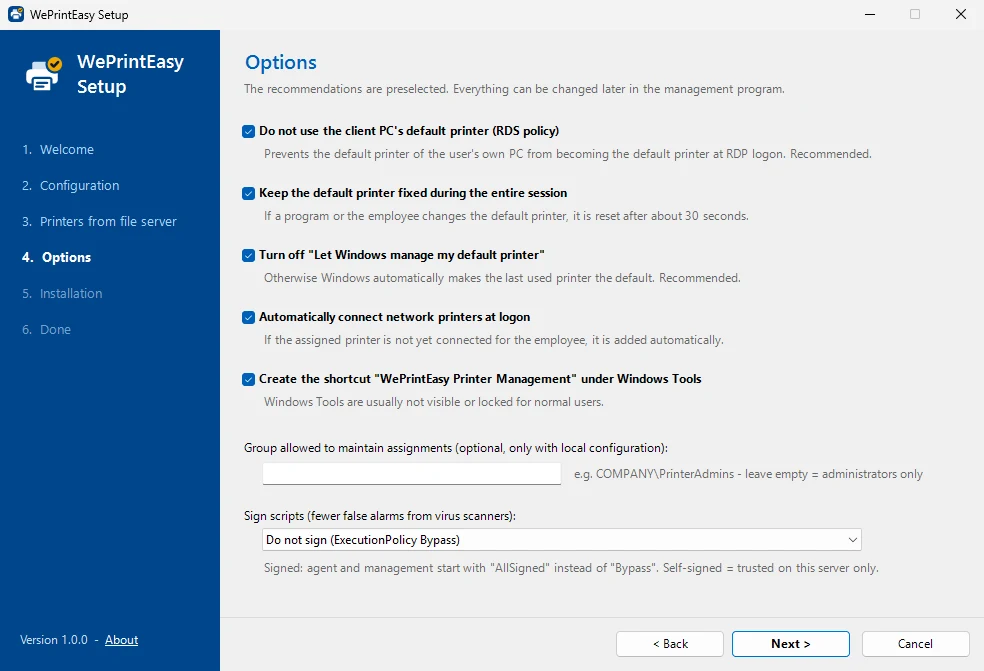
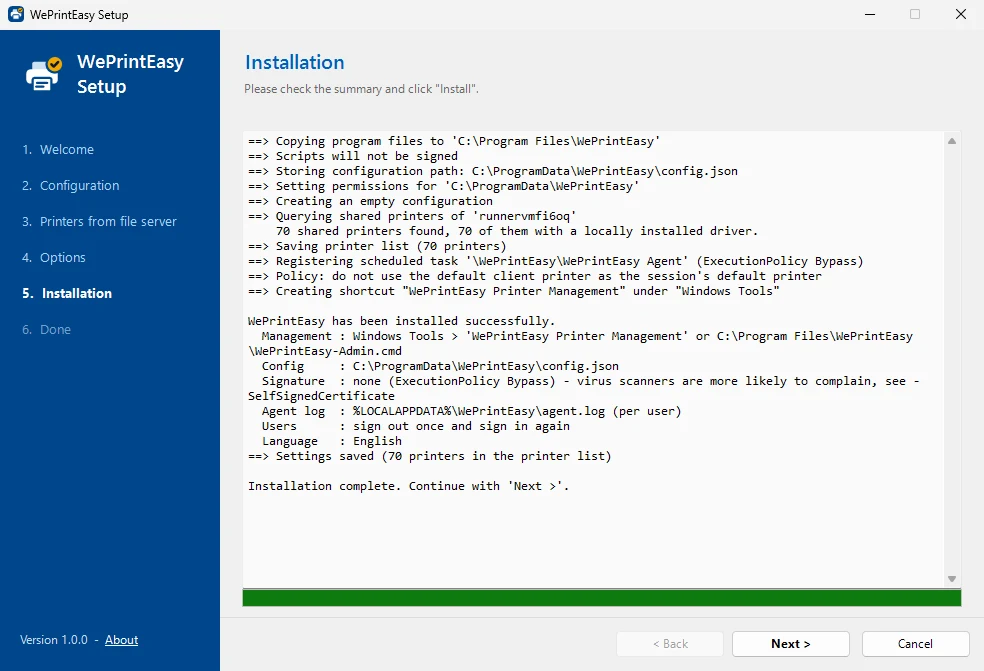
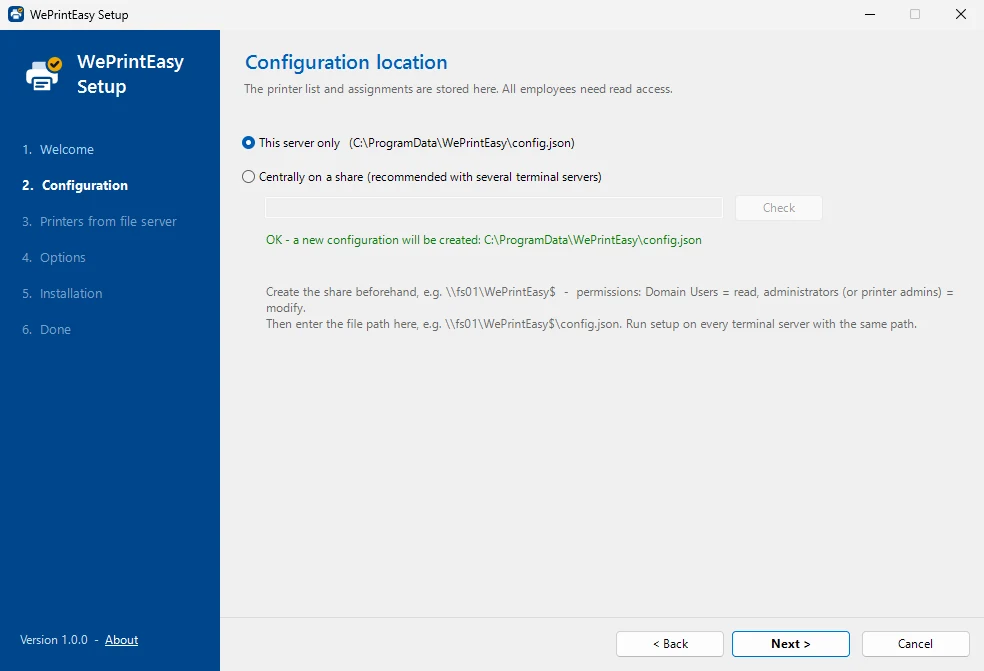
A double-click on Setup.cmd is all it takes. The wizard asks for administrator rights and the language, then guides you through: welcome (detects an existing installation), configuration (local or central on a share, with write test), printers from the print server, options and installation with live log. At the end it can open the admin console.
- Takes about two minutes
- English or German
- Recommended options are preselected
- Code signing can be enabled in the options
Check user: which printer – and why?
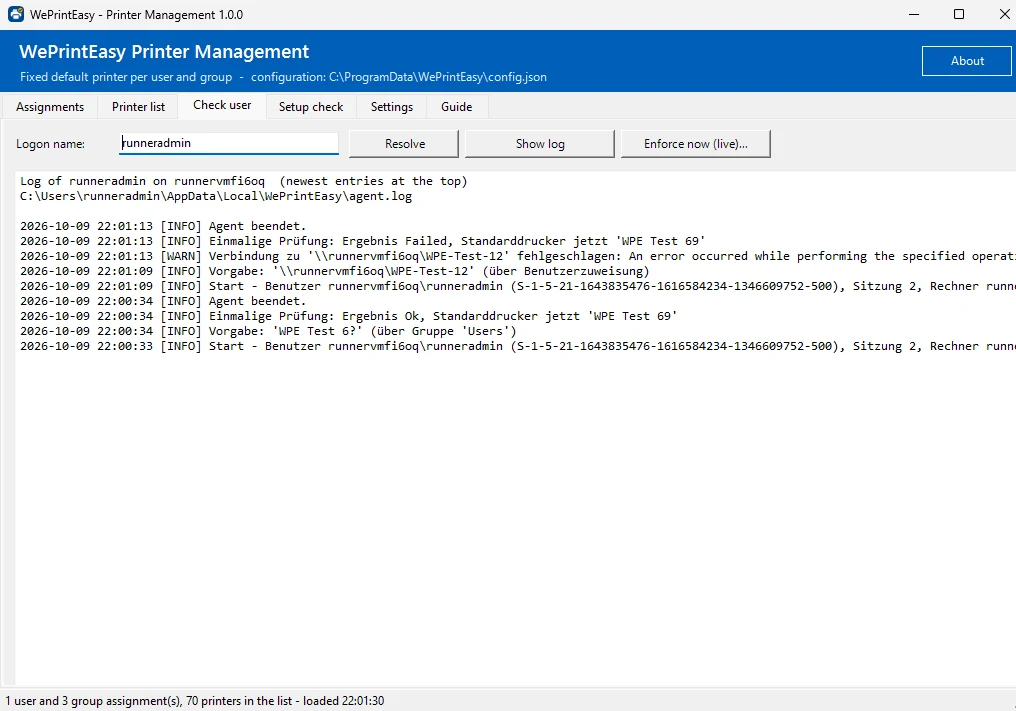
Resolve shows for a logon name which printer will be set at the next logon and through which assignment, including all matching groups. Show log displays what the agent did for this user on this server – for example “Default printer set: … (previously: …)”. That way you also see what changed the printer.
- Resolution including all matching groups
- Agent log per user and server
- Log location:
%LOCALAPPDATA%\WePrintEasy\agent.log
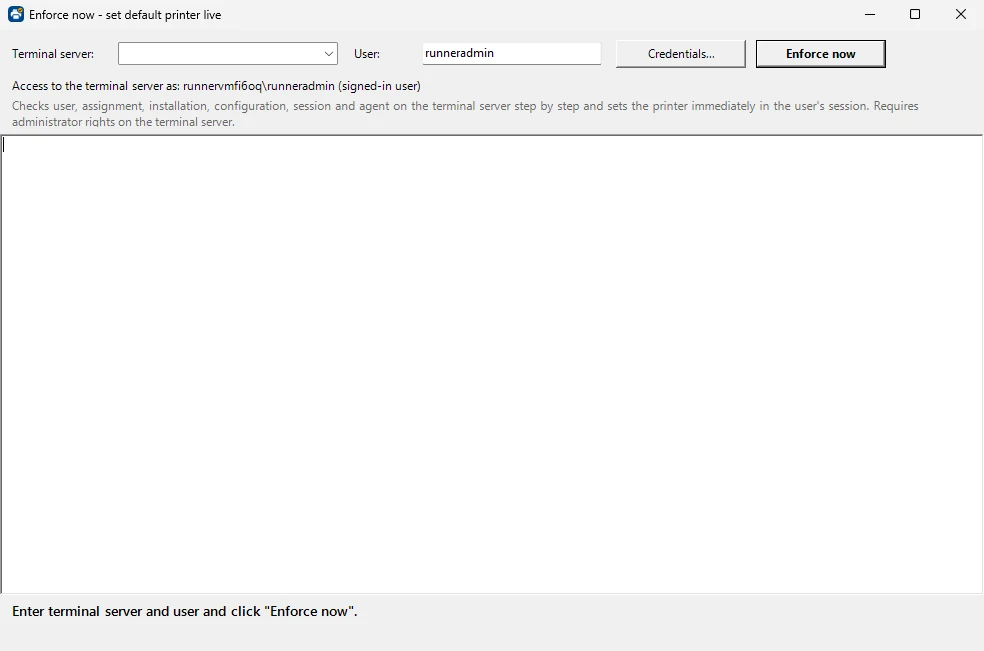
“Enforce now”: remote diagnostics for one user
Select an assignment and click Enforce now…, choose the terminal server – and watch the check step by step: the user in AD and their valid assignment, DNS (with a suggestion for typos), connection, installation and logon task on the server, whether the server reads the same configuration, whether the user is logged on, the current default printer and whether the agent is running. Then the agent is started once immediately in the user’s session and its log is shown live. Result: the new default printer, otherwise the reason according to the agent.
Requires administrator rights on the terminal server; other credentials can be entered with Credentials…. Also available as Invoke-WpeRemoteForce in PowerShell.
- Temporary task that is removed afterwards
- Starts permanent monitoring if no agent is running in the session
- Typo in the server name? It suggests similar names from AD
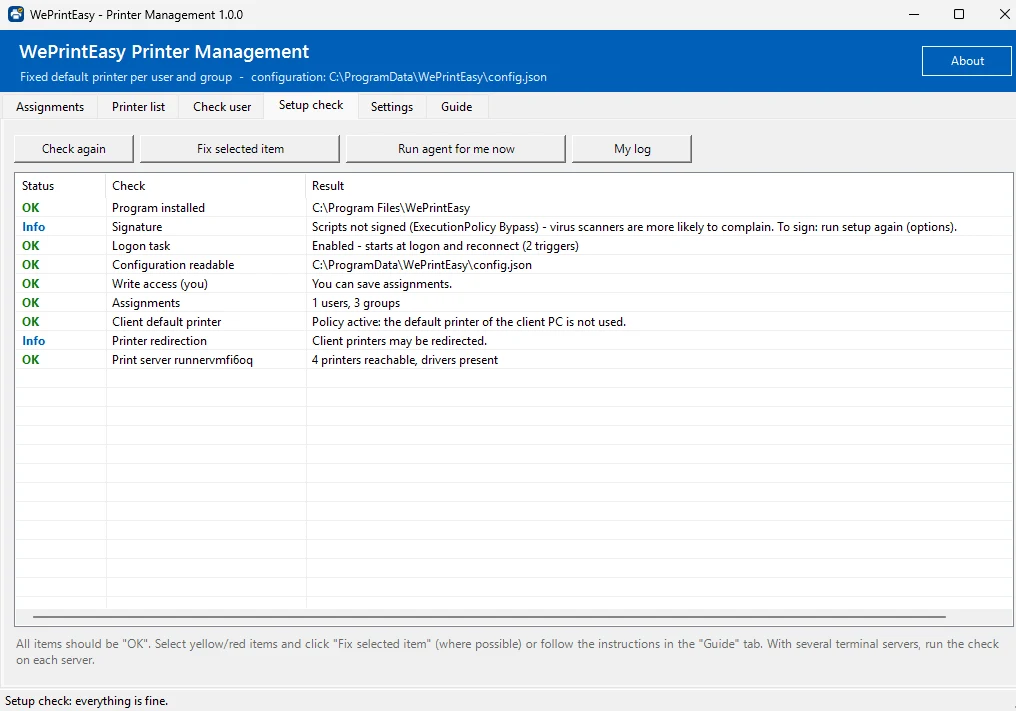
System check with traffic lights
The Setup check tab checks installation, signature, logon task, configuration, write permissions, assignments and RDS policies, plus for every print server in use: reachable, shares present, drivers installed locally. Fix selected item resolves issues such as a missing policy. Run agent for me now tests the agent in your own session.
- Status OK / Warning / Error / Info
- One-click fixes where possible
- Runs automatically at the end of every update
RDS farms with a central configuration
Store config.json on a file share, for example \\fs01\WePrintEasy$\config.json, and install WePrintEasy on every session host with this path. All hosts use the same assignments. Users only need read access; administrators – or a group such as “Printer admins” – get modify rights.
With a local configuration, an editor group can maintain assignments without administrator rights.
- One configuration for all session hosts
- Write test in the setup wizard
- Configuration written atomically, previous version kept as
config.json.bak
Updates by double-click, clean uninstall
Unpack the new version and double-click Update.cmd. The updater reinstalls the program files and keeps every setting: configuration path, assignments, printer list, signing, editor group, RDS policy and shortcut. At the end it shows the system check. Agents already running in user sessions use the new version from the next logon.
Uninstall-WePrintEasy.ps1 removes everything again; the configuration is kept unless you add -RemoveConfig.
Update-WePrintEasy.ps1 -NoPausefor automated updates- A self-signed certificate is renewed by the update from 30 days before it expires
- A central configuration on a share is never deleted by the uninstaller
Code signing against antivirus false positives
Without a signature, the logon task starts the agent invisibly with -ExecutionPolicy Bypass – a pattern some antivirus products flag as suspicious. With signing enabled, all installed scripts are Authenticode-signed and task, shortcut and admin console start with -ExecutionPolicy AllSigned.
Choose a self-signed certificate (valid 5 years, non-exportable key, trusted only on this server) or a code signing certificate from your company CA, optionally with a timestamp.
- Signing is preserved on updates
- If signing fails, installation continues unsigned with a warning
- Signature status is shown in the system check
PowerShell module and CSV bulk import
The module WePrintEasy.psm1 can be used in your own scripts: list, set and remove assignments, import them from a CSV file in bulk, or run “Enforce now” from the console.
Get-WpeAssignment,Set-WpeAssignment,Remove-WpeAssignmentImport-Csv … | Set-WpeAssignmentInvoke-WpeRemoteForce -ComputerName TS01 -UserName jdoe
In English or German
Setup wizard, admin console, installer, updater and agent log are available in English and German. The setup wizard asks for the language first (default: English); the command-line installer takes -Language en or -Language de.
The language can be changed later under Settings → Language. It is stored in the configuration and therefore applies to all servers that use it – running agents pick it up without a new logon.
- The shortcut is named “WePrintEasy Printer Management” or “WePrintEasy Druckerverwaltung”
- Updates keep the chosen language
- Agent log in the configured language
Guide built into the program
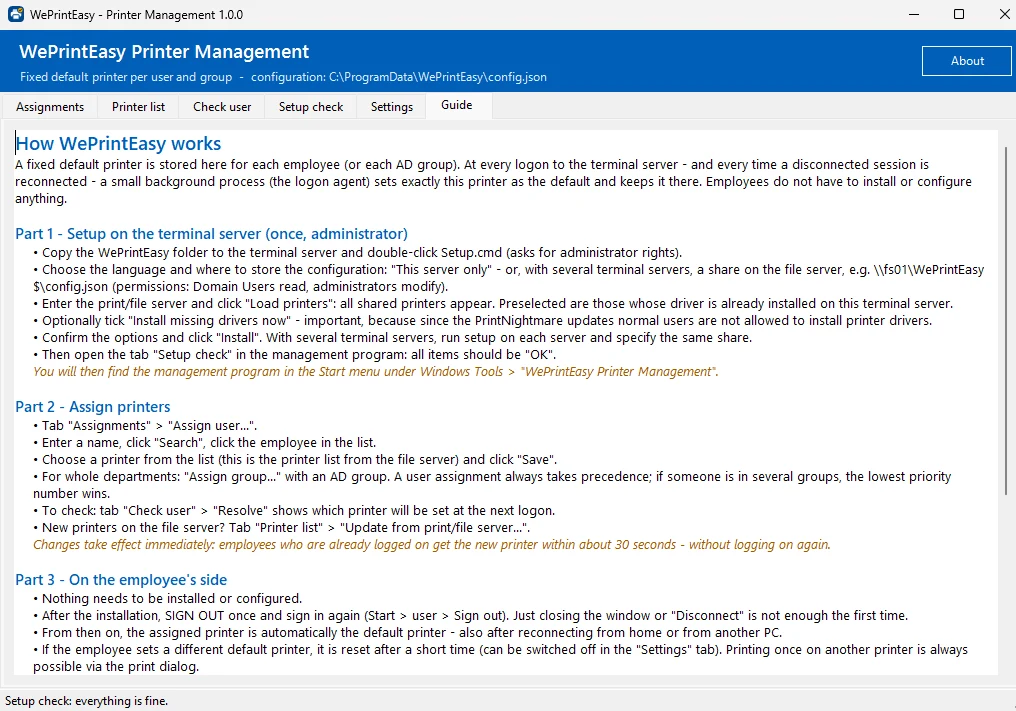
The Guide tab explains everything step by step – setup on the server, assigning printers, what happens for the user, troubleshooting. Help is always where you need it.
Give every user the right printer – from the next logon.
Try WePrintEasy on a test server first. Setup takes about two minutes.
Free · MIT licence